


Best Way to Mop a Floor Like a Pro
Pet hair, baby food, and mud from dirty shoes, your floor takes a lot of beating throughout the day. While sweeping may work fine for daily cleanup of light soil and dust particles, traditional damp mopping by far remains the most effective way to deep clean the different types of floorings.
The high traffic areas such as kitchens, bathrooms, entryways, hallways, and dining areas should be vacuumed or swept in every 2-3 days and mopped at least once a week. A good thorough weekly mopping is what you need to make your floor spotlessly clean and well-sanitized.
In this article, I will share with you the general steps to mop a floor properly and then tell you what homemade cleaning solution works best for different types of floorings.
Steps To Mop A Floor Properly
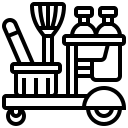
Before I start explaining the steps to mop the floor properly, here are a few essential cleaning tools you may need to complete the task.
* Sponge
* Microfiber cloth
* Dust Mop
* String Mop
* Broom and dustpan
* Bucket
* Spray bottle
* Scrub brush
* Toothbrush
* Vacuum cleaner
#1. Before you start mopping
There are two important things you need to consider before you start mopping the floor. First, you will need to choose a suitable mop based on the flooring at your home. String mop or a strip mop, which one is right for you? I have listed the different types of mops to choose from, later in this article.
Secondly, you will need to prepare the right cleaning solution for your flooring type. I strongly suggest avoiding the products that advertise as ‘mop and shine’ because they contain strong chemicals that can damage the floor. I have also added a list of suitable cleaners based on different types of floor.
#2. Sweep and vacuum the floor
Moping without getting rid of the dust on the carpet or dry food particles on the floor will result in a dirty mess and negate the entire effort spent in cleaning. For best results, remove the light furniture, carpets, and rugs from the area you intend to clean. Start by sweeping the floor thoroughly and use a vacuum cleaner to get rid of smaller particles like hair, food crumbs etc.
Don’t drag large furniture as you will scratch the floor. Move only the small furniture items and dust the curtains, bed sheets, rugs, and carpets before you start sweeping so that the dirt and debris fall on the floor.
#3. Preparing the mopping solution
Fill the mopping bucket with hot water as it cleans quicker and better than cold water. Add the cleaning detergent or solution to the water. Avoid adding excess in the hope to clean better as this will only result in a concentrated soapy mess, making it difficult to rinse later.
#4. Wet and wring the mop
Dip the mop in the cleaning solution and wring it to remove excess water by hand or with the help if a wringer. Make sure the mop is wet enough to clean but not dripping with soapy water. If you try cleaning with too much water, this will not only damage the floor but also increase the drying time.
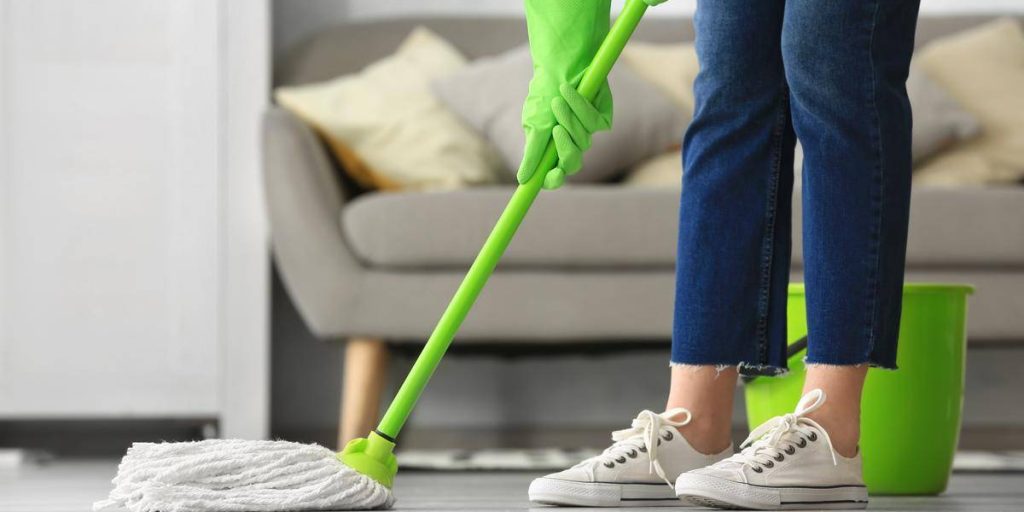
#5. Start mopping
I would suggest that you start mopping from the innermost room or area of the house and work your way outwards. Cover the area to be cleaned by mopping from one end to the other, and move backward as you do.
Make sure you stand on the un-mopped portion as you clean to keep a track of the area covered with the mop. If using a sponge mop, it’s always best to clean in straight lines. If you are using a rag mop, I would suggest that you clean in a figure-8 pattern to use your mop more effectively.
#6. Rub the stubborn and sticky spots
While most of the area will be cleaned easily by applying the same amount of pressure, there might be some sticky spots that require some extra effort. Rub back and forth over the spot, squat down if needed and apply some pressure downwards to remove the dirt. For hard-to-reach areas and edges, you may need to clean with paper towels or a sponge.
If you have scrubbed an area to get rid of sticky dirt, make sure you rinse again with clean water. Dip the mop a few times to get rid of the dirt on the surface and wring it out. Now, rinse the area with the damp mop to get a shiny and clean surface.
#7. Continue the process
Once you are done with the stubborn spots, continue mopping the remaining area of the house as mentioned above. As you mop, keep checking the cleansing solution water and wash water. If they turn visibly gray and dingy, empty the dirty water and refill the bucket with clean water.
If you are mopping the entire house, make sure you change the water frequently. I personally prefer to change after each room so that the dirty water from one room does not spread over other areas of the house.
#8. The final rinse
After you have mopped the entire floor area, it should look clean but there might be some soapy residue that requires a final rinse. In this step, mop the entire area once again with only hot water. It won’t take as much time as it did the first time because the floor is already clean and there are no more spots to rub.
#9. Let the floor and mop dry
Let the floor dry completely before anybody walks on it. If you have kids at home, doing the kid’s room first is a clever idea as you can tell them to stay in the room while the rest of the house is mopped. Switch on the ceiling or table fan to quicken the drying process.
After you are done with the mopping, let the mop and bucket dry completely under the sun to get rid of any bacteria or bad odor. When it’s completely dry, store away the mopping tools until next time.